Tools of the Trade

By Lotte Govaerts

(This post was originally published on the Rogers Archaeology Lab blog on February 6, 2024. You can see the original post archived here.)

This image-heavy blog post is all about tools! Today we want to tell you not about tools found in archaeological contexts but rather about the tools archaeologists use to excavate sites. Well, about a few of those tools, anyway.

A few years ago, I tweeted a series of photos for a “31 Days of Archaeology” Twitter event, in which participants posted archaeology-themed photos in response to a series of prompts.[1] One of the prompts was “Tools of the Trade”. On that day, I posted a photo of the contents of my tool bag. My Twitter followers later expressed some interest in seeing that tweet turned into a blog post, so I have now expanded that tweet into this post. Come join my exploration of the objects in the first photo! As it may be difficult to see all the tools in that photo, I’m including some closeups below. As always, you can click each image to see a larger version [Repost edit: This is no longer true, but the images here are much bigger than they were on TypePad].

A pile of slightly dirty tools spread out on a light-colored vinyl floor. It includes trowels, measuring tapes, folding rulers, spoons, root clippers, brushes, screwdrivers, spoons, and a bunch of gloves
The contents of the author’s tool bag. Photo Lotte Govaerts

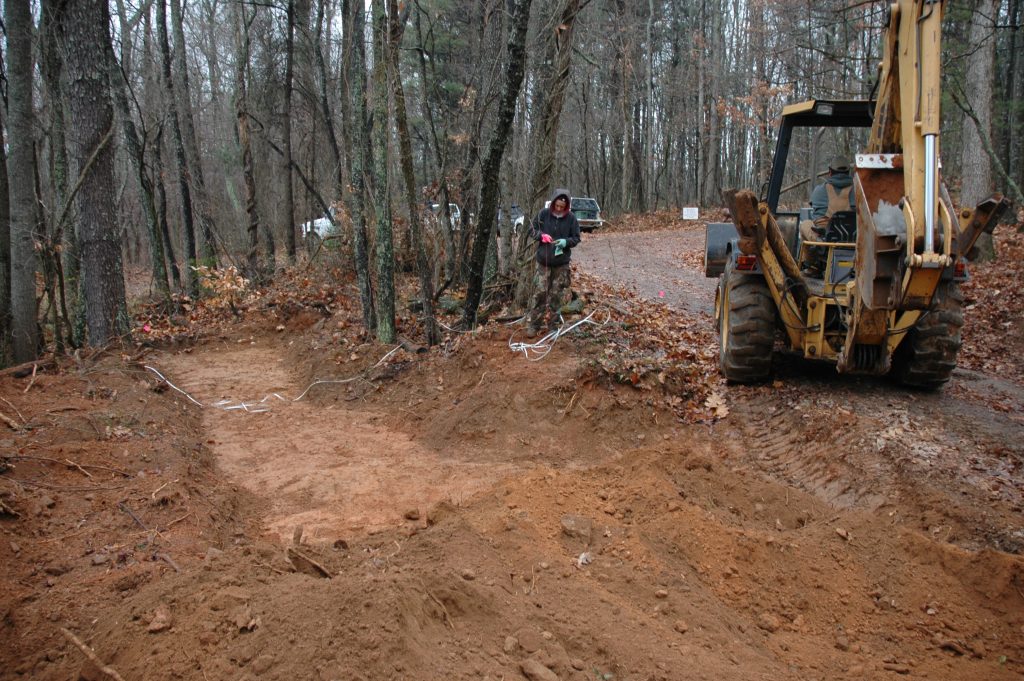
Before I get started, I should clarify that the contents of my tool bag are optimized for field work on the east coast of the United States. Archaeologists who do fieldwork in places with different soils and different climate conditions may have a completely different set of tools! In addition, the tools pictured here are hand tools that fit in my bag. We typically use larger tools as well. You will see some of those other tools in the photos below, though I will not discuss them in detail.

I should also add that I have not done regular fieldwork since I came to the Rogers Archaeology Lab; I only occasionally volunteer on other people’s projects now. Therefore, many of the photos in this post are more than a few years old, even if I talk about the work in the present tense.

Trowels
Three slightly dirty trowels on a blue background with a photo scale.
The author’s trowels. Photo: Lotte Govaerts.

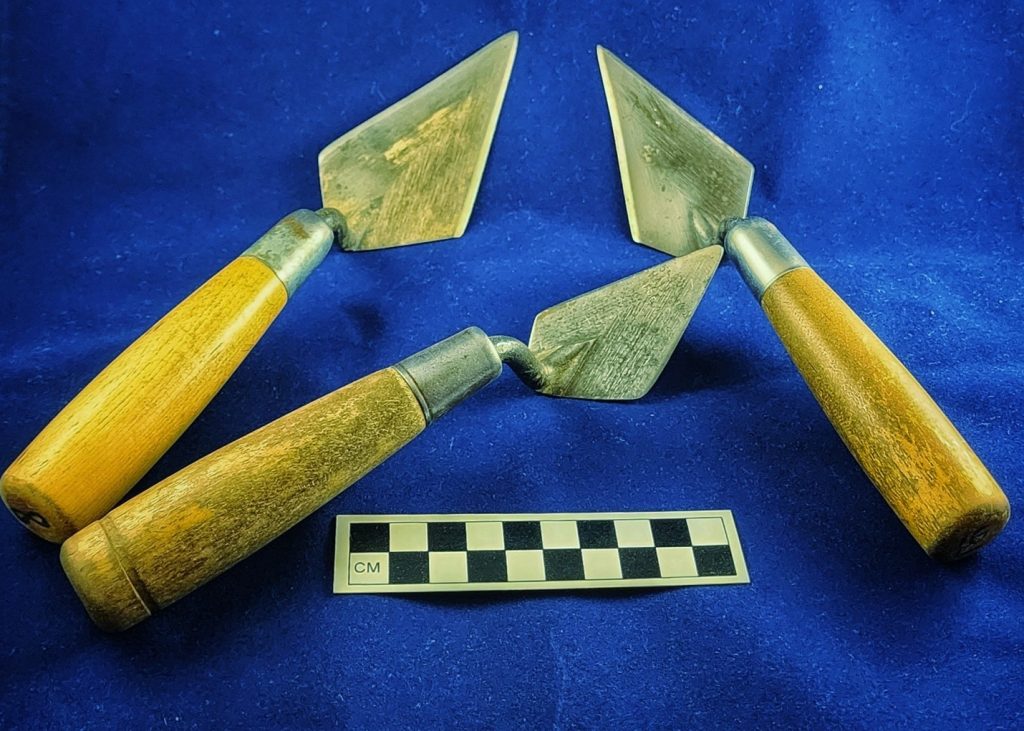
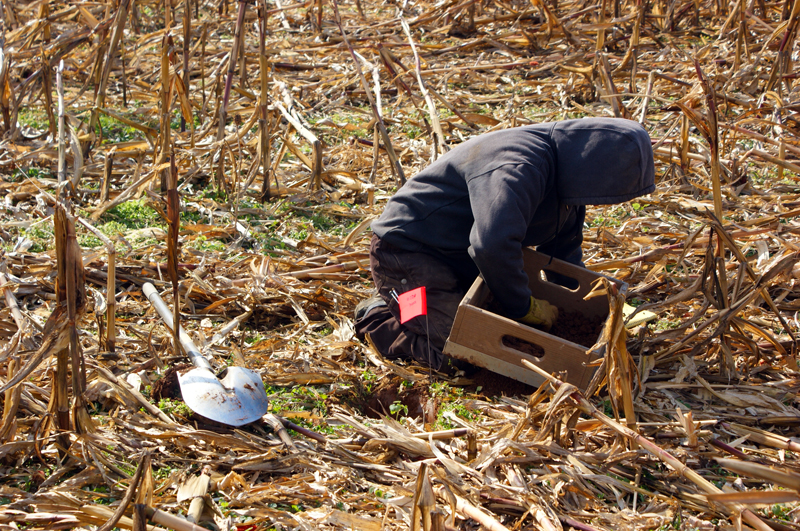
Pictured here are my trowels. While not all archaeological work involves digging, digging is still a central activity in this profession, and these trowels are my main digging tools, alongside shovels. Archaeological excavations involve various conditions and situations. Some situations require the use of shovels or even big earth-moving equipment to dig. In other situations, when more precision is required, small hand tools are better suited to the job.

Two connected 2m x 2m test units in the process of being excavated. Both units are excavated to the same level, which slopes down to the right side of the photo, not parallel to the ground surface. The profile wall on the right shows three distinct levels, in different soil colors. The author is sitting in the test unit closest to the camera, scraping the soil with a trowel and moving it to a bucket to be screened. Outside of the units a colleague stands by a screen suspended from metal poles.
The author using a trowel to dig. In this case, I was carefully digging down a soil level without cutting into the level below. You can see a few different soil levels in the walls of these test units; they have different colors. Photo: Appalachian State University Laboratories of Archaeological Science (ASULAS)/US Forest Service (USFS).

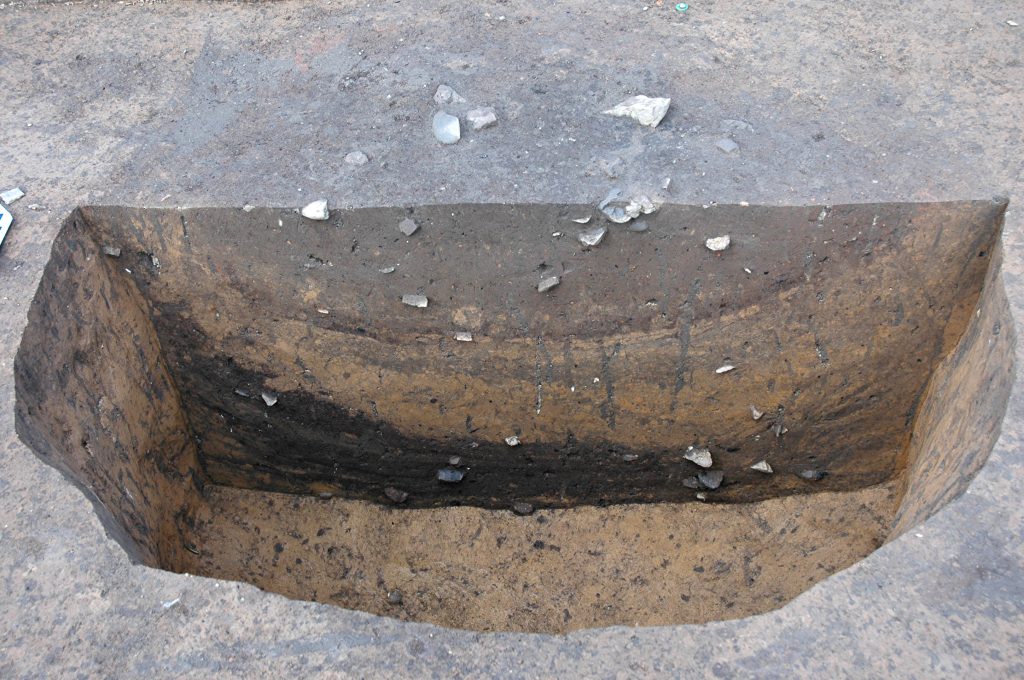
The three trowels in the photo all started out the same size – a bit larger than the largest of the three – but they have gotten smaller over time due to sharpening. They have been sharpened many times! Why do we need sharp trowels? The sharp edge not only makes digging easier, but it also makes the soil easier to read. When you scrape a soil surface with a sharp edge, the different soil colors and textures become much easier to see. If you continue to work on that surface, walk on it, or brush dirt over it, the soil gets all smudged and these features become invisible. That’s why we clean our working surfaces with trowels every time we take photos and start investigating something new on that surface.

A large excavated surface being scraped by a row of people. The author is working in the top right of the photo, colleagues' hands and feet are visible along the edges. The surface includes some burn material that shows black and orange against the brown surrounding soil.
The author and colleagues, trowel-cleaning a large surface. Photo: Exploring Joara Foundation.
Several connected 2x2 m and 1x2 m excavation units combined into a larger area excavated to the level of subsoil. A single 2x2 unit with a tree in the middle remains unexcavated; another excavated unit is partially visible behind it. A small 1x2 area excavated slightly deeper than the rest and not matching set on the same grid represents an older test unit. Features are visible as darker areas against a yellowish brown subsoil.
A freshly cleaned surface (by the author and colleagues), showing the outlines of various features, visible as darker areas against the lighter colored subsoil. Photo: ASULAS/USFS.
A large excavated area with several large features (building outlines) and post holes visible as darker stains on a lighter, yellowish brown subsoil. The author is crouching on the edge of a photo, preparing to set a photo board down.
The author on a large, freshly cleaned surface, preparing a sign board for a photo. The dark square area is a burned building. The partial outline of another, round building can be seen just above it, partially covered by topsoil. The area that is cut out deeper than the surrounding soil was an early test trench. The shovel in the top left functions as a north arrow. This surface was cleaned by a row of people working side by side. Photo: Warren Wilson College Archaeology Lab/Exploring Joara Foundation.
An excavated surface with the outline of a round feature flanked by a photo board and a scale bar. The author is standing to the side, spraying water onto the feature. The sprayed soil looks darker than the surrounding, dried out soil.
The author, spraying water onto the outline of a feature and the surrounding soil in preparation for a photo. Adding water makes features stand out more in photos, as even after cleaning with trowels, these outlines become invisible quickly as the soil dries out. Photo: Blue Ridge Archaeological Consultants (BRAC).
Measuring tools
Measuring tapes and folding rulers on a blue photo background with a photo scale
A collection of measuring tapes and folding rulers. Photo: Lotte Govaerts.

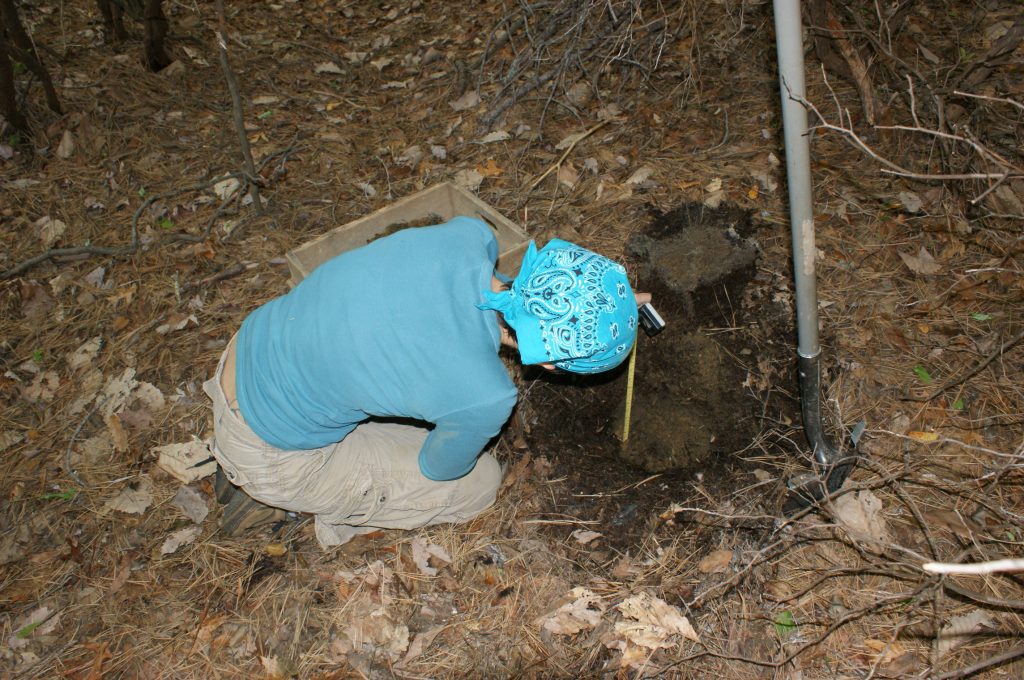
Archaeological fieldwork requires a lot of measuring. That’s why my tool bag contains several tape measures and other measuring instruments. Because archaeological excavation is destructive by its very nature, it is very important that we carefully document everything we do and find as we excavate. We use these tools to establish grids for digging and to note the coordinates of in-situ finds. We also carefully map each level.

A half excavated feature, seen from the non-excavated side so that the profile is not visible. On the edge of the excavated half, a piece of pink string is pulled tight across the width of the feature on metal pins. A line level hangs on the string. A folding ruler is unfolded along the edge. Behind that, you can see arms and legs of the author and colleague, in the process of mapping the profile.
The author and a colleague mapping a feature profile (i.e., drawing the outlines of the different soils/deposits in the profile, see next photo). One folding ruler measures horizontal distance, the other vertical. Photo: Exploring Joara Foundation.
Another half excavated feature, this one photographed from the other side, so the profile wall is visible. Several different soil levels of different colors can be seen.
One half of this feature has been excavated. You can see the different deposits/soil levels in the profile. We photograph and draw these profiles before excavating the other half. Photo: ASULAS.
op down view of the author leaning over a fairly shallow, 30cm diameter test pit, holding a tape measure into the pit. A box screen with soil in it sits next to the author. A shovel stands up, stuck in the soil next to the test pit. The background is leaf- and needle-covered forest floor.
The author using a tape measure to measure the depth of a test pit. Photo: BRAC/USFS.
A forest scene with a dirt/gravel road to the right and a test trench dug by a backhoe to the left. The backhoe is driving away onto the road while the author stands by the trench rolling up string and a long tape measure used to measure across long distances. Vehicles are partially visible parked in the background.
The author rolling up some string and a very long measuring tape after doing some long-distance measuring. Photo: ASULAS.
Spoons

The spoons pictured in the top photo are also used for digging. When we dig features with rounded edges, the rounded shapes of different-sized spoons come in handy. It’s impossible to dig out these shapes with the straight edges of trowels!

The author, sitting next to a test unit with a lot of rocks in it, arranged into a square-ish shape (they are the remains of a house chimney). The author is using a spoon to dig.
The author, using a spoon to dig between rocks. Photo: ASULAS.
The author and a colleague, digging an irregularly shaped feature in the corner of a test unit. A pile of spoons, root clippers, and brushes are sitting next to the author.
The author and a colleague, excavating a feature with a few spoons, of different sizes and shapes, at the ready. Photo: ASULAS/USFS.
Root clippers
Two sets of root clippers on a blue photo background with a photo scale. One is a standard size, the other is smaller, for finer work. Both have red handles.
Different sized root clippers or gardening shears. Photo: Lotte Govaerts.

I refer to these tools as “root clippers” even though they’re clearly… gardening shears. In archaeology, we use them to cut roots, though. We try not to bother the trees too much, but there’s typically a larger version on site too, as well as a saw or two, to cut larger roots we encounter in our excavation squares.

Brushes
Three different sizes of paint brushes, all with black bristles and yellow handles with a red point on the bottom of the handle, and one blue and clear plastic tooth brush with white and blue bristles, all on a blue photo background with a photo scale.
Three paint brushes and a toothbrush, all with some dirt on them. Photo: Lotte Govaerts

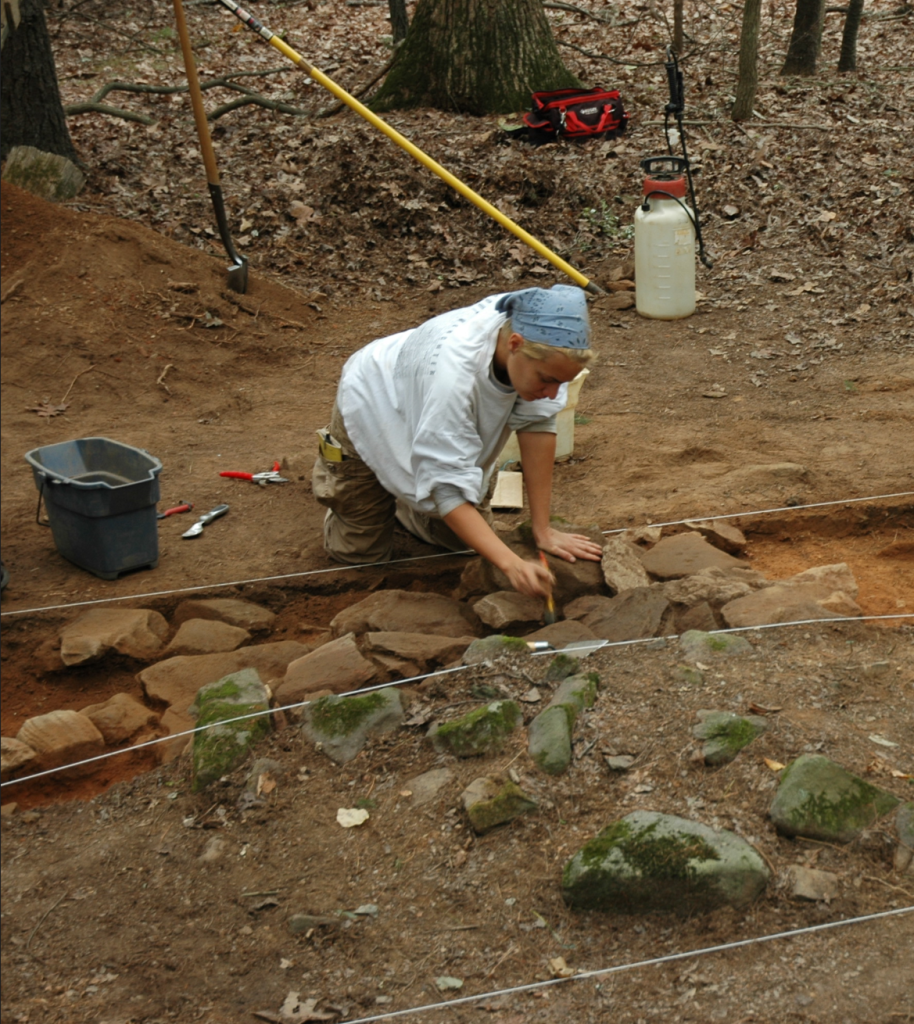
These paint brushes are used to brush loose dirt off certain surfaces. Brushing dirt off a soil surface is usually pointless, because (depending on the soil) doing so will smear the surface, but brushes come in very handy when cleaning up rocks and other hard surfaces.

I don’t use toothbrushes a lot in the field, although I use them regularly when processing freshly excavated artifacts in the lab.  I keep one in my tool bag for those occasions when I want to scrub some dirt off the broken edge of a sherd to see the temper, for example.

The author, kneeling over a test unit (the same one as pictured before with the chimney rocks in the center), brushing soil off rocks. An unexcavated part of the test unit is in the foreground with rocks sticking up out of the surface.
The author, using one of the brushes pictured in the previous photo to brush dirt off rocks. Photo: ASULAS.
The author, working in a 1x1 m test unit, approximately 20 cm down, in a grassy field. Next to the unit are a dust pan (for moving soil into buckets), root clippers, and a brush.
The author digging a test unit with root clippers and a brush handy on the side. Photo: BRAC
Gloves
A black and yellow work glove, lying palm up on a blue photo background, with the fingers towards the camera. All fingers have holes, except maybe the pinky.
A glove with holes in the fingers. Photo: Lotte Govaerts.

You’ll note that I have a lot of gloves in my bag. That’s because I use them a lot and because archaeological fieldwork is very hard on them; activities like screening (pushing dirt through a metal screen) cause holes, especially in the fingers. Screening without gloves can be dangerous, as for example chipped stone tools that are hundreds or thousands of years old are still sharp and it’s easy to cut yourself as you’re pushing the soil through the screen. There could also be glass or metal fragments in the soil. Some of the pictured gloves are for warmth rather than for protection. I wear those underneath the sturdier work gloves when it is very cold out.

Flagging tape

I can’t remember now why a piece of flagging tape with the word “unfinished” on it was in my bag, but we use pieces of brightly colored flagging tape like that (the roll that piece came from was not in my bag; I typically keep it in my backpack so it stays clean) to mark locations out in the woods (we remove it when we’re done!) or to label bags of soil and other items. We also use similarly bright pin flags to mark grid coordinates, the location of test pits, or surface finds.

Approximately 50 white soil bags sitting in a forested area. They all have a piece of orange flagging tape tied around the top. The author is bending over a bag in the  background, tying on or writing on the flagging tape.
The author using flagging tape to label bags of soil. Photo: ASULAS/USFS.
A green forested area in spring or summer. In the foreground, a piece of orange flagging tape is tied around a tree. In the background, the author is digging a test pit.
The author, digging a test pit along a line marked with flagging tape. Photo: BRAC/USFS.
A road cut on a hillside. A disturbed surface is marked with many orange pin flags. The author stands by a 50x50 cm test unit and a screen suspended from metal poles. A shovel, dust pan, and a couple of buckets sit beside the test unit.
The author, screening soil from a test unit at a site disturbed by an illegal road cut. In this image, the orange pin flags represent surface finds. Each flag marks an artifact found on the disturbed surface. Blue pin flags mark the grid and have coordinates on them. Photo: BRAC/USFS.
The author, kneeling over a box screen, screening the soil in it, next to a test pit marked with an orange pin flag. The background is a wintertime cornfield with some rusty-colored stalks still sticking up among many others covering the surface.
The author screening dirt from a test pit in a box screen. The orange pin flag marks a grid location. The coordinates are written on the flag. Photo: BRAC.
Screwdrivers

As you can see, my tool bag contains two screwdrivers. I don’t typically need two screwdrivers at the same time, but it’s good to have backups! I occasionally need a screwdriver to fix a screen or other piece of equipment but that is not an everyday kind of thing when I am doing fieldwork.

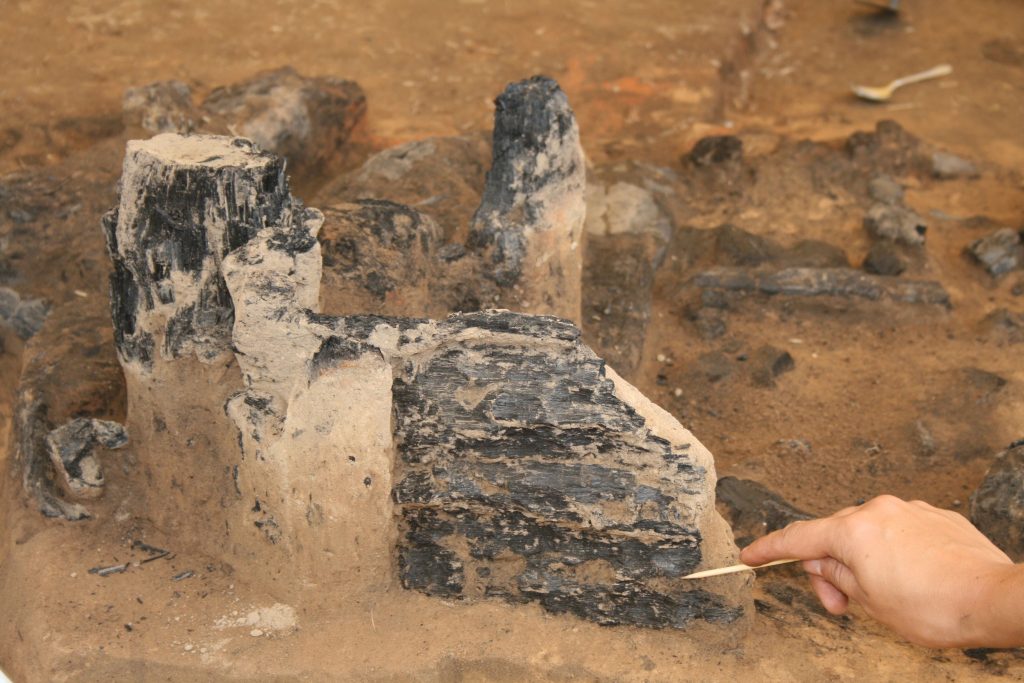
Pointy wooden sticks

The small wooden tools seen in the first photo (mostly in the top left) are used for excavating delicate objects, like pieces of burned wood, or for getting the dirt from between rocks or other tight spaces.

The author, on an excavated surface, sitting next to a rocky feature, one half of which is being excavated. A dustpan and several tools sit next to the feature, as well as a bucket. The edge of an excavated feature is partially visible on the left. A large piece of black plastic is folded up behind the author. It covers the excavation area when it is not being worked on.
The author using a wooden tool to dig between rocks. Photo: ASULAS.
Several pieces of burned wood pedestaled in an excavation area. In the foreground, a person's hand holding a small wooden skewer to remove soil from a piece of burned wood.
A colleague using a wooden tool to excavate a piece of burned wood. Photo: The Exploring Joara Foundation.
Pens and pencils

I keep a few pens and pencils in my tool bag; I have more in my backpack where they stay clean longer. We use thin sharpies to write on bag tags and thick sharpies to write on flagging tape, pin flags, and sometimes artifact bags. We use pens and pencils to take notes and fill out forms. When we excavate test units, we fill out a unit level form for each level; in it, we note details such as soil color and texture and describe the types of artifacts we encountered during excavation.

The author, sitting on a large orange toolbox, holding several papers and a metal box that holds more papers. In the foreground, the profile wall of a couple connected test units is visible. The outlines of different soil levels and plow scars are marked with the edge of a trowel. The background is a grassy field with a tree farm behind it.
The author, filling out forms. Photo: The Exploring Joara Foundation.
The author, kneeling next to a small, 30cm diameter test pit and a box screen full of soil from that test pit, taking notes in a small waterproof notebook. A shovel sticks up next to the author. The background is a grassy field.
The author, taking notes while digging a test pit. Photo: BRAC.
Line level

The line level (next to the pens and pencils in the bottom left of the top photo) is mostly used for mapping profiles (the exposed wall of a test unit or a feature). It provides a straight, level reference to measure everything in the profile against, as seen in the photo I posted above to illustrate folding rulers in use, which I will reproduce here for your convenience.
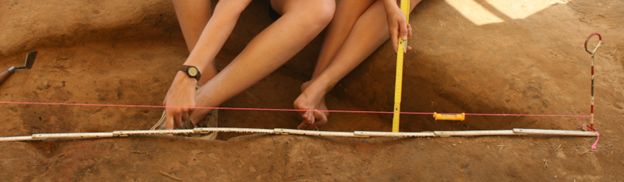
A half excavated feature, seen from the non-excavated side so that the profile is not visible. On the edge of the excavated half, a piece of pink string is pulled tight across the width of the feature on metal pins. A line level hangs on the string. A folding ruler is unfolded along the edge. Behind that, you can see arms and legs of the author and colleague, in the process of mapping the profile.
The author and a colleague mapping a feature profile. A line level is attached to pink string pulled tight across the surface of a half-excavated feature. Photo: The Exploring Joara Foundation.
String

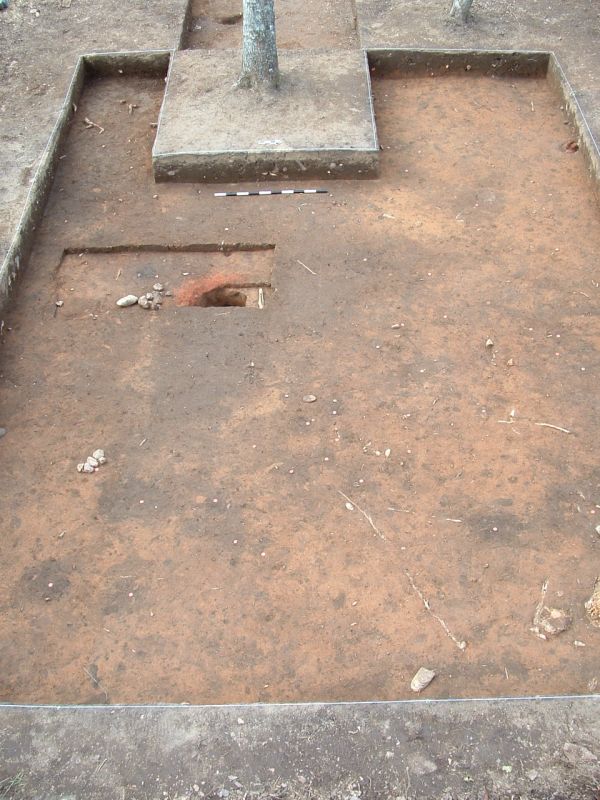
The white string (center left in the first photo) is mainly used for marking grids/excavation units as well as for drawing profiles. I keep it in a plastic bag so that it doesn’t turn brown from being in contact with the dirty tools in my tool bag. White, or a bright color like the pink in the previous photo, is easier to distinguish from the soil in photos. You can see the string around many of the excavation units in the photos above and below.

A green wooded setting in springtime. The author is shoveling soil from a 1x1 m test unit into a screen suspended from three metal poles. The test unit is marked with white string. Excavation has only just started.
The author, just starting on a small test unit marked with white string. Photo ASULAS/USFS.
A top down view of the author and a colleague working in adjoining test units, offset by a half unit (because of the shape of the riverbank, not in the photo). White string follows the outline of the test units. The units are excavated to the same depth (40 cm or so) but a small baulk is left in place between the two.
The author (left) and a colleague, excavating adjoining test units. The units are offset by a half unit’s width, due to the shape of the riverbank just outside the photo. Note the white string around the units. Photo ASULAS/USFS.
Files

Files are used for sharpening trowels and shovels. This needs to be done fairly regularly as the edges become dull relatively quickly. Sharp edges make digging much easier!

The author, seated on a paved path leading up to a house, sharpening a round point shovel with a file.
The author, sharpening a shovel. Photo: Isaac Brownell.
Bag tags

The bag tags seen in the center right of the top photo are paper cards used for labeling all artifacts. I keep a few of them in my tool bag, but most of them are kept in a cleaner place. Once the required details have been filled out, these tags are placed inside a small plastic bag that goes inside a larger artifact bag; the smaller bag keeps them from getting wet or dirty through contact with artifacts that come straight out of the soil. Each artifact bag gets a tag with information about the location where the artifacts were found (i.e., grid coordinates, level) along with the date, the name of the project and/or the site number (sometimes we collect artifacts outside of sites or on sites that do not yet have a number, so it is important to record the project name as well), and some other details.

A stack of clear ziplock bags, with smaller bags inside that hold rectangular pieces of paper with details about the artifacts inside.
A stack of artifact bags with tags inside. Photo: Lotte Govaerts.
Other tools

As you can clearly see in the photos above, we use many other tools in the field. Shovels, screens, measuring tape and shears too big to fit in a tool bag, buckets and dust pans (for collecting the soil excavated by trowel and depositing it into a screen) We also sometimes use heavy digging equipment, homemade equipment like water screening constructions and flotation tanks, and both small and larger electronics. These tools are either too big, too delicate, or too clean to be in a tool bag and are therefore not discussed here.

A bare, wintery forest setting. The author is standing by a water screen, consisting of in this case a single square screen sitting on a wooden frame covered with black plastic. Water is spraying from a hose into the screen and leaking out of the bottom, creating a large muddy area in front of the screen.
The author using a water screen to screen soil. Photo: ASULAS/USFS.
A green, summery forest setting, though the author is covered in a rain jacket and gloves(for protection from wasps rather than weather). The author is kneeling next to a very mossy pile of rocks, looking down at a gps unit.
The author taking a GPS reading to mark the location of a small section of wall in the woods. BRAC/USFS.

I hope you enjoyed this stroll through the contents of my tool bag, through some of the sites where I worked in the past, and through some of the more scenic places in western North Carolina, my main work area before I joined the Rogers Archaeology Lab and moved my research interests to the Great Plains. Stay tuned for updates on more recent research that will be posted here soon.


[1] The prompts were written by Kim Biddulph, who has since left Twitter and deleted the original post; therefore, that post is not linked here.

Leave a Reply